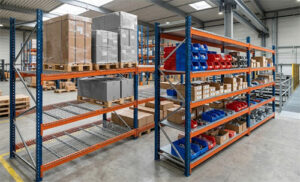
Determining the safe capacity of a cantilever rack involves careful consideration of several practical factors without relying solely on formulas or tables. Here’s how to approach it systematically:
1. Start with Manufacturer Specifications
Load Rating Labels: Check for a visible manufacturer’s label on the uprights or arms. This states the maximum allowable load per arm and total system capacity.
Engineering Drawings: Request these from the supplier. They outline tested capacities for specific configurations (arm length, height, spacing).
Never exceed these values – they’re based on structural testing and safety margins.
2. Evaluate Load Characteristics
Weight Distribution:
Concentrated weight (e.g., a steel coil) stresses arms more than evenly distributed loads (e.g., lumber).
Place heavier items closer to the upright (not at the arm’s end).
Load Shape & Stability:
Irregularly shaped items (pipes, machinery) may shift or create uneven pressure.
Use supports like upright back panels or cross-bracing to prevent tipping.
Dynamic Forces:
Impacts from forklifts, vibrations, or seismic activity reduce effective capacity. Allow a safety buffer (e.g., 20% below max rated capacity).
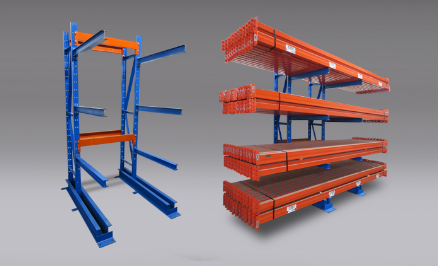
3. Assess Rack Configuration
Arm Length: Longer arms (e.g., 8 ft) hold less weight than shorter arms (e.g., 4 ft) due to leverage.
Vertical Spacing: Heavier loads should be on lower arms (closer to the floor). Upper arms are weaker.
Upright Strength:
Taller uprights (>20 ft) or wider column spacing reduce capacity.
Multi-tiered systems may need reinforced bases or floor anchors.
4. Consider Environmental Factors
Corrosion: Rust (in humid/damp environments) weakens metal over time. Reduce capacity by 15–30% if corrosion is visible.
Temperature: Extreme heat or cold can affect metal integrity.
Seismic/Wind Zones: In earthquake-prone areas, derate capacity by 25–50% unless racks are specifically engineered for seismic loads.
5. Account for Installation & Maintenance
Proper Anchoring: Unanchored racks can tip. Ensure anchors are secured to concrete floors (not asphalt).
Level Ground: Uneven floors cause uneven load distribution.
Damage Inspection: Regularly check for:
Bent arms or uprights.
Cracks or weld failures.
Loose/missing bolts.
Damaged components reduce safe capacity to ZERO – replace immediately.
6. Practical Load Testing (If Unsure)
Gradual Loading: Start with 50% of the expected weight, then incrementally increase while monitoring:
Visible deflection (sagging) of arms.
Upright wobbling or base movement.
Deflection Limit: If arms bend more than 1/180th of their length (e.g., 0.5″ for a 6 ft arm), stop loading – it’s overstressed.
Observe Over Time: Loads may settle or shift hours/days after placement.
7. Consult Professionals
Rack Manufacturer: Provide details of your loads and environment for tailored guidance.
Structural Engineer: For custom configurations, heavy loads (>5,000 lbs/arm), or complex installations.
OSHA/Compliance Experts: Ensure adherence to local regulations (e.g., ANSI MH16.1 in the US).
Key Safety Principles
Never stack above upright height: Top loads should not extend higher than the topmost arm.
Avoid eccentric loading: Center loads between arms; don’t hang items off the sides.
Uniform distribution: Distribute weight evenly across multiple arms when possible.
Document everything: Keep records of load weights, inspections, and modifications.